Install Image Gallery in Microsoft Teams
Step-by-step setup guide for uploading Image Gallery as a custom Microsoft Teams app and granting admin consent.
Last updated: May 31, 2026
Image Gallery is provided as a Microsoft Teams app package that can be uploaded to your organization’s Microsoft 365 tenant as a custom app. This guide walks Teams or Microsoft 365 administrators through uploading the package in Teams admin center and granting admin consent.
Try without a license
Organizations that have not purchased a license yet can still install the app and try it free for 30 days with up to 10 users. The trial automatically starts when the first user signs in.
Need your IT team to install Image Gallery?
If you are an end user and want your IT department to install Image Gallery for you, click here for more details.
Before You Begin
You need a Teams or Microsoft 365 admin account that can upload custom apps and grant admin consent for your organization.
Download the app package first. The package file is the zip file you will need to upload in Teams admin center.
Download Teams app package| Item | Value |
|---|---|
| Package file | appPackage.prod.zip |
| Version | 1.1.9 |
| Size | 32,923 bytes |
| Download URL | https://web.imagegallery.dialtoneapps.com/downloads/appPackage.prod.zip |
Step-by-Step Setup
Microsoft guidance
Microsoft Learn explains the tenant settings behind custom app upload in custom app policies and settings.
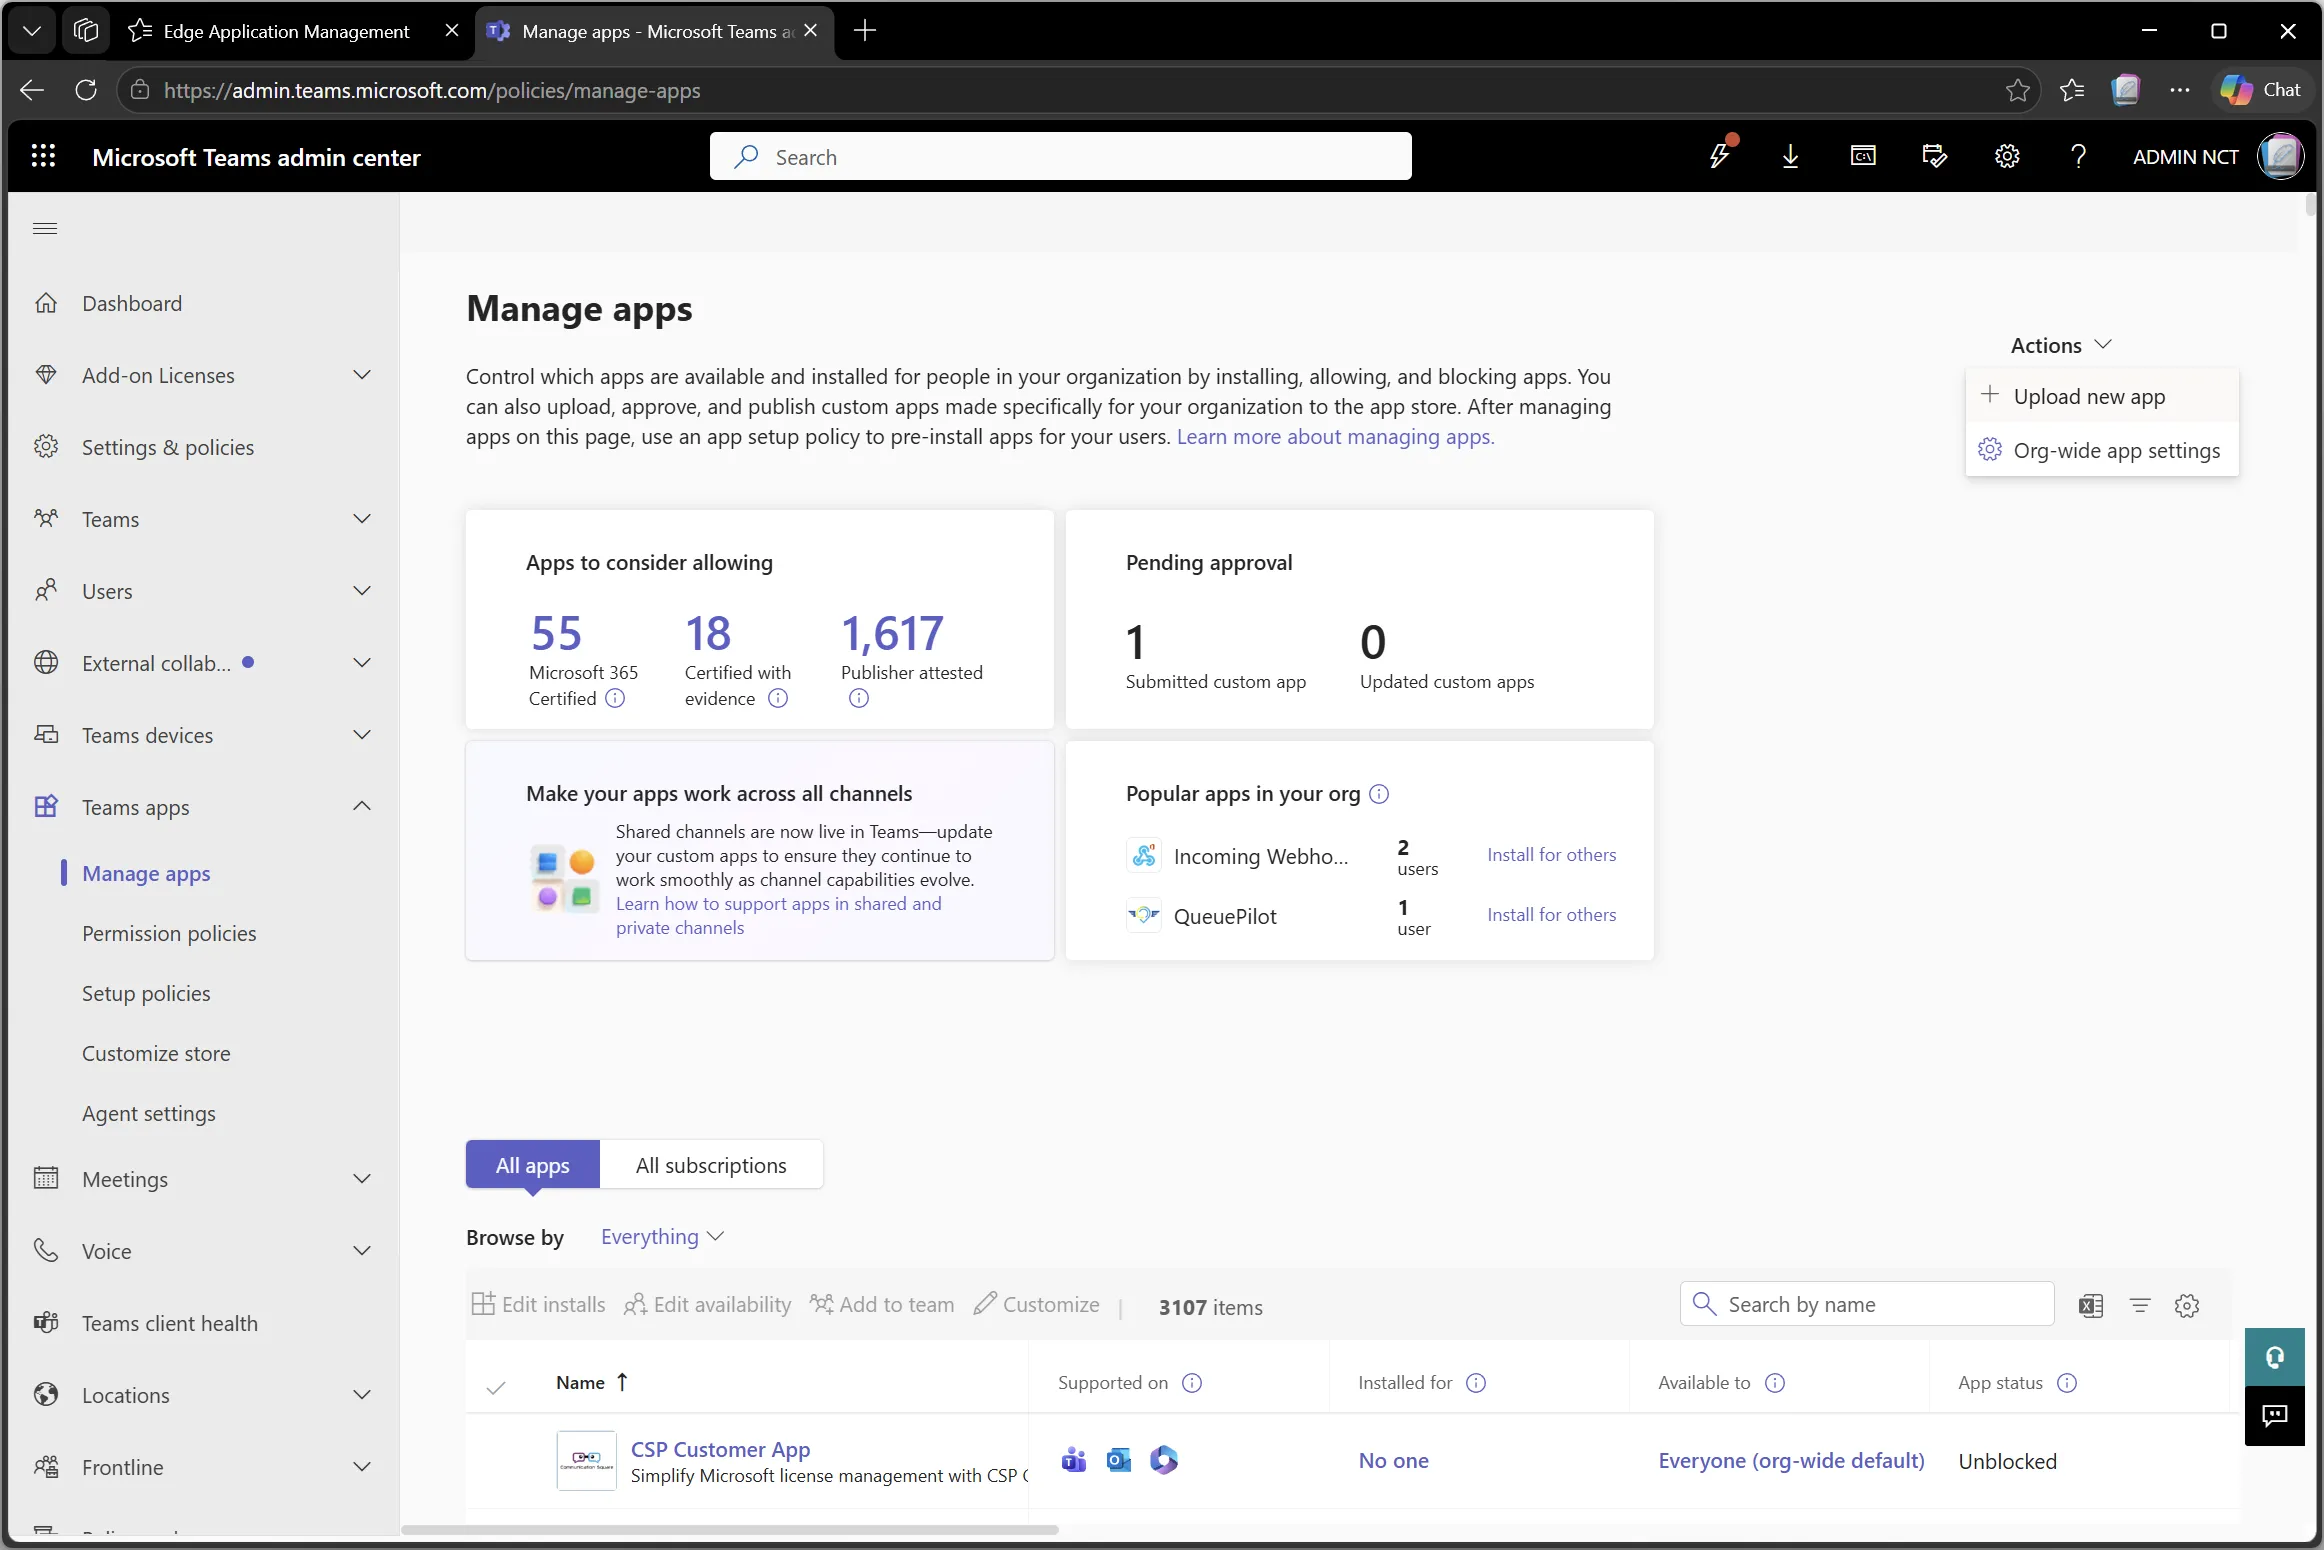
1. Start a New App Upload
In Teams admin center, go to Teams apps > Manage apps. Open Actions, then select Upload new app.
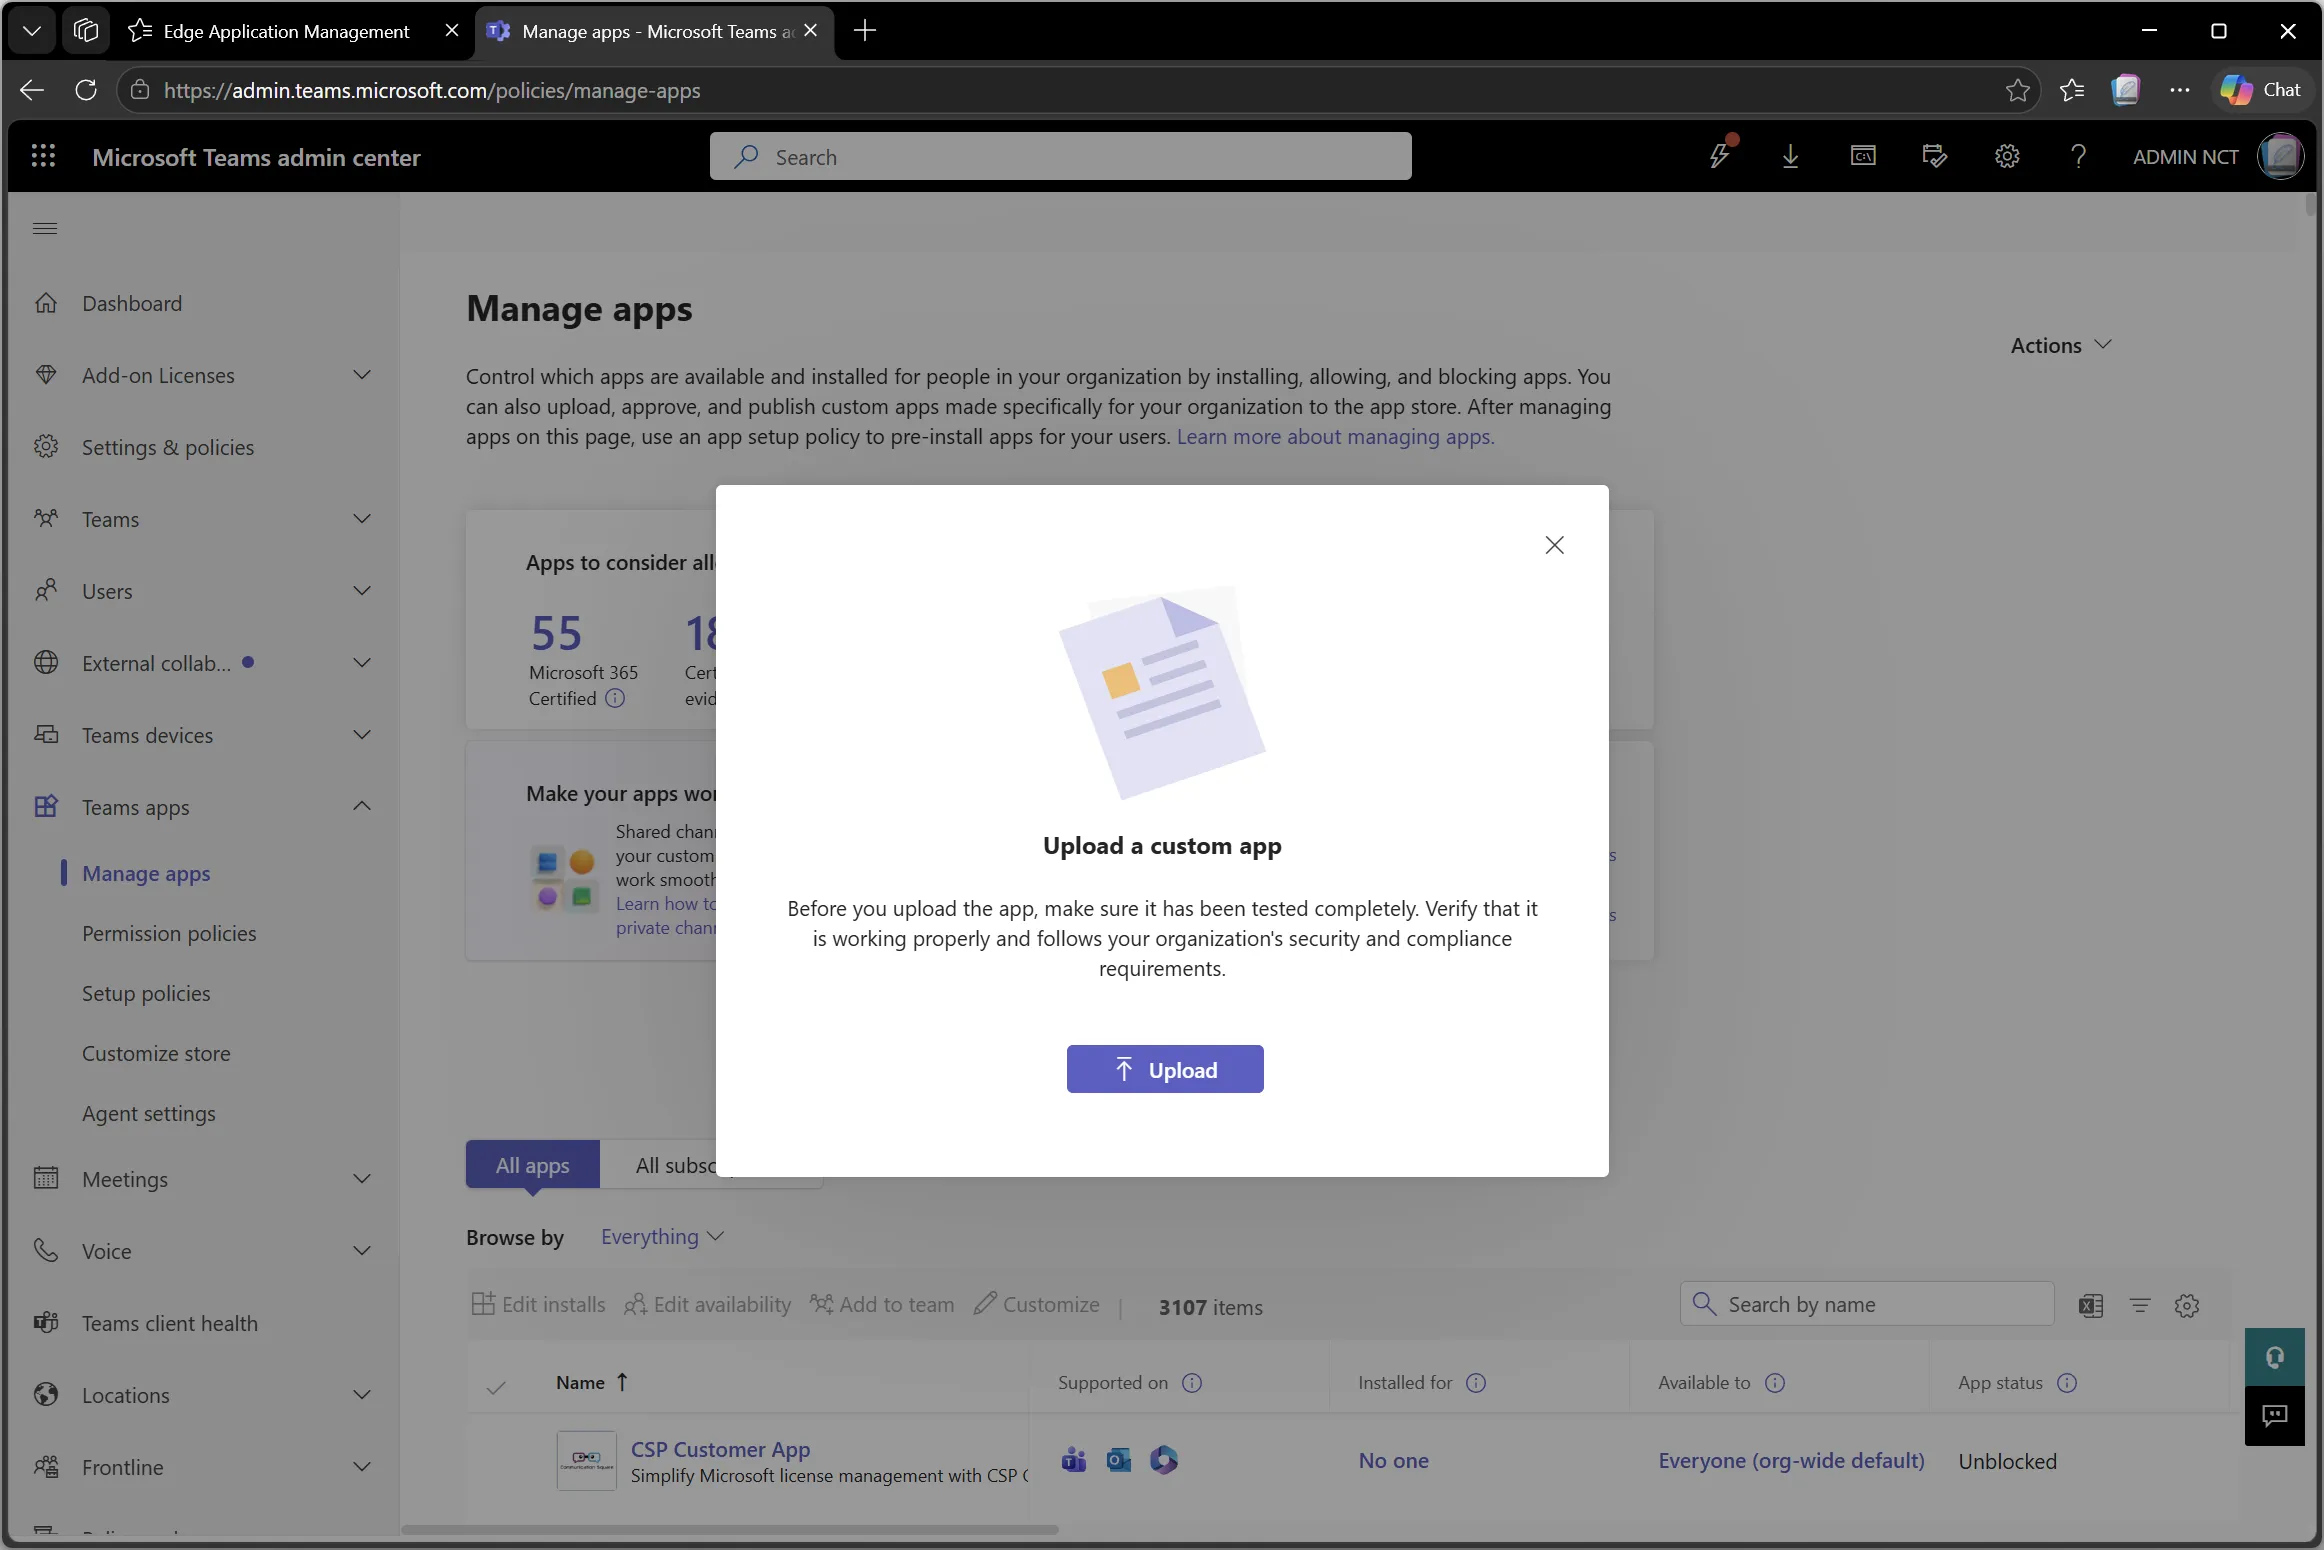
2. Choose Custom App Upload
In the upload dialog, select Upload.
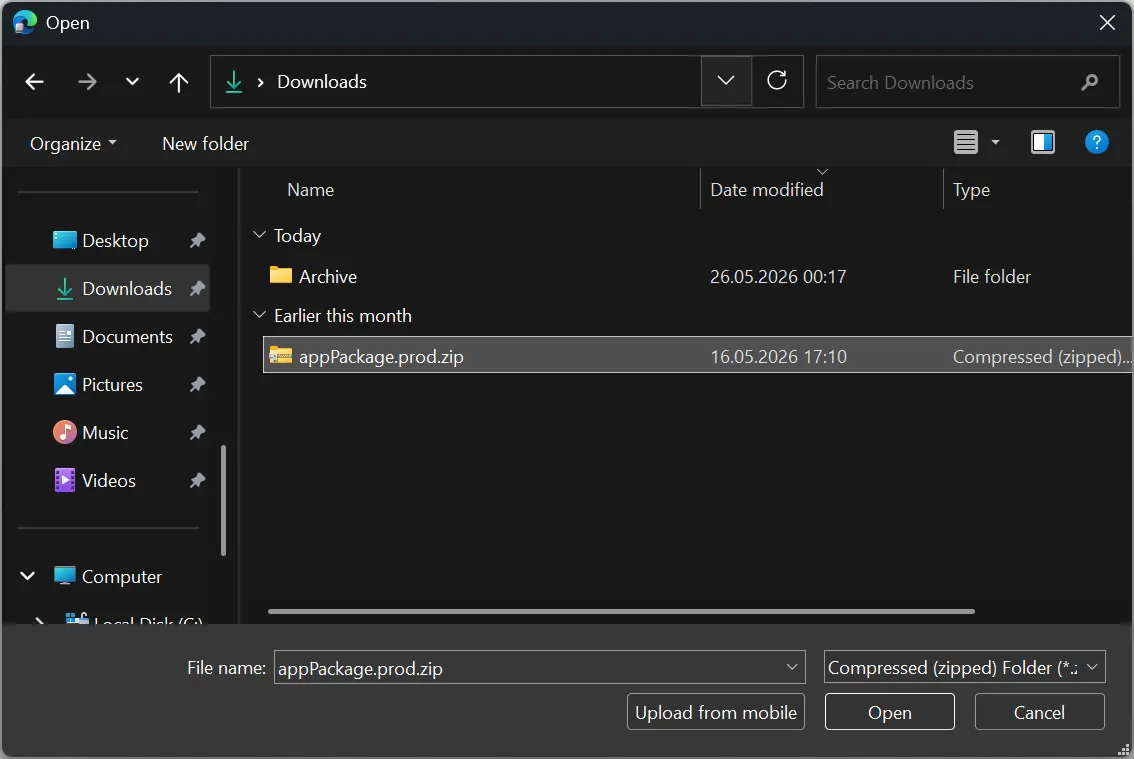
3. Select the App Package
Choose the downloaded appPackage.prod.zip file and select Open.
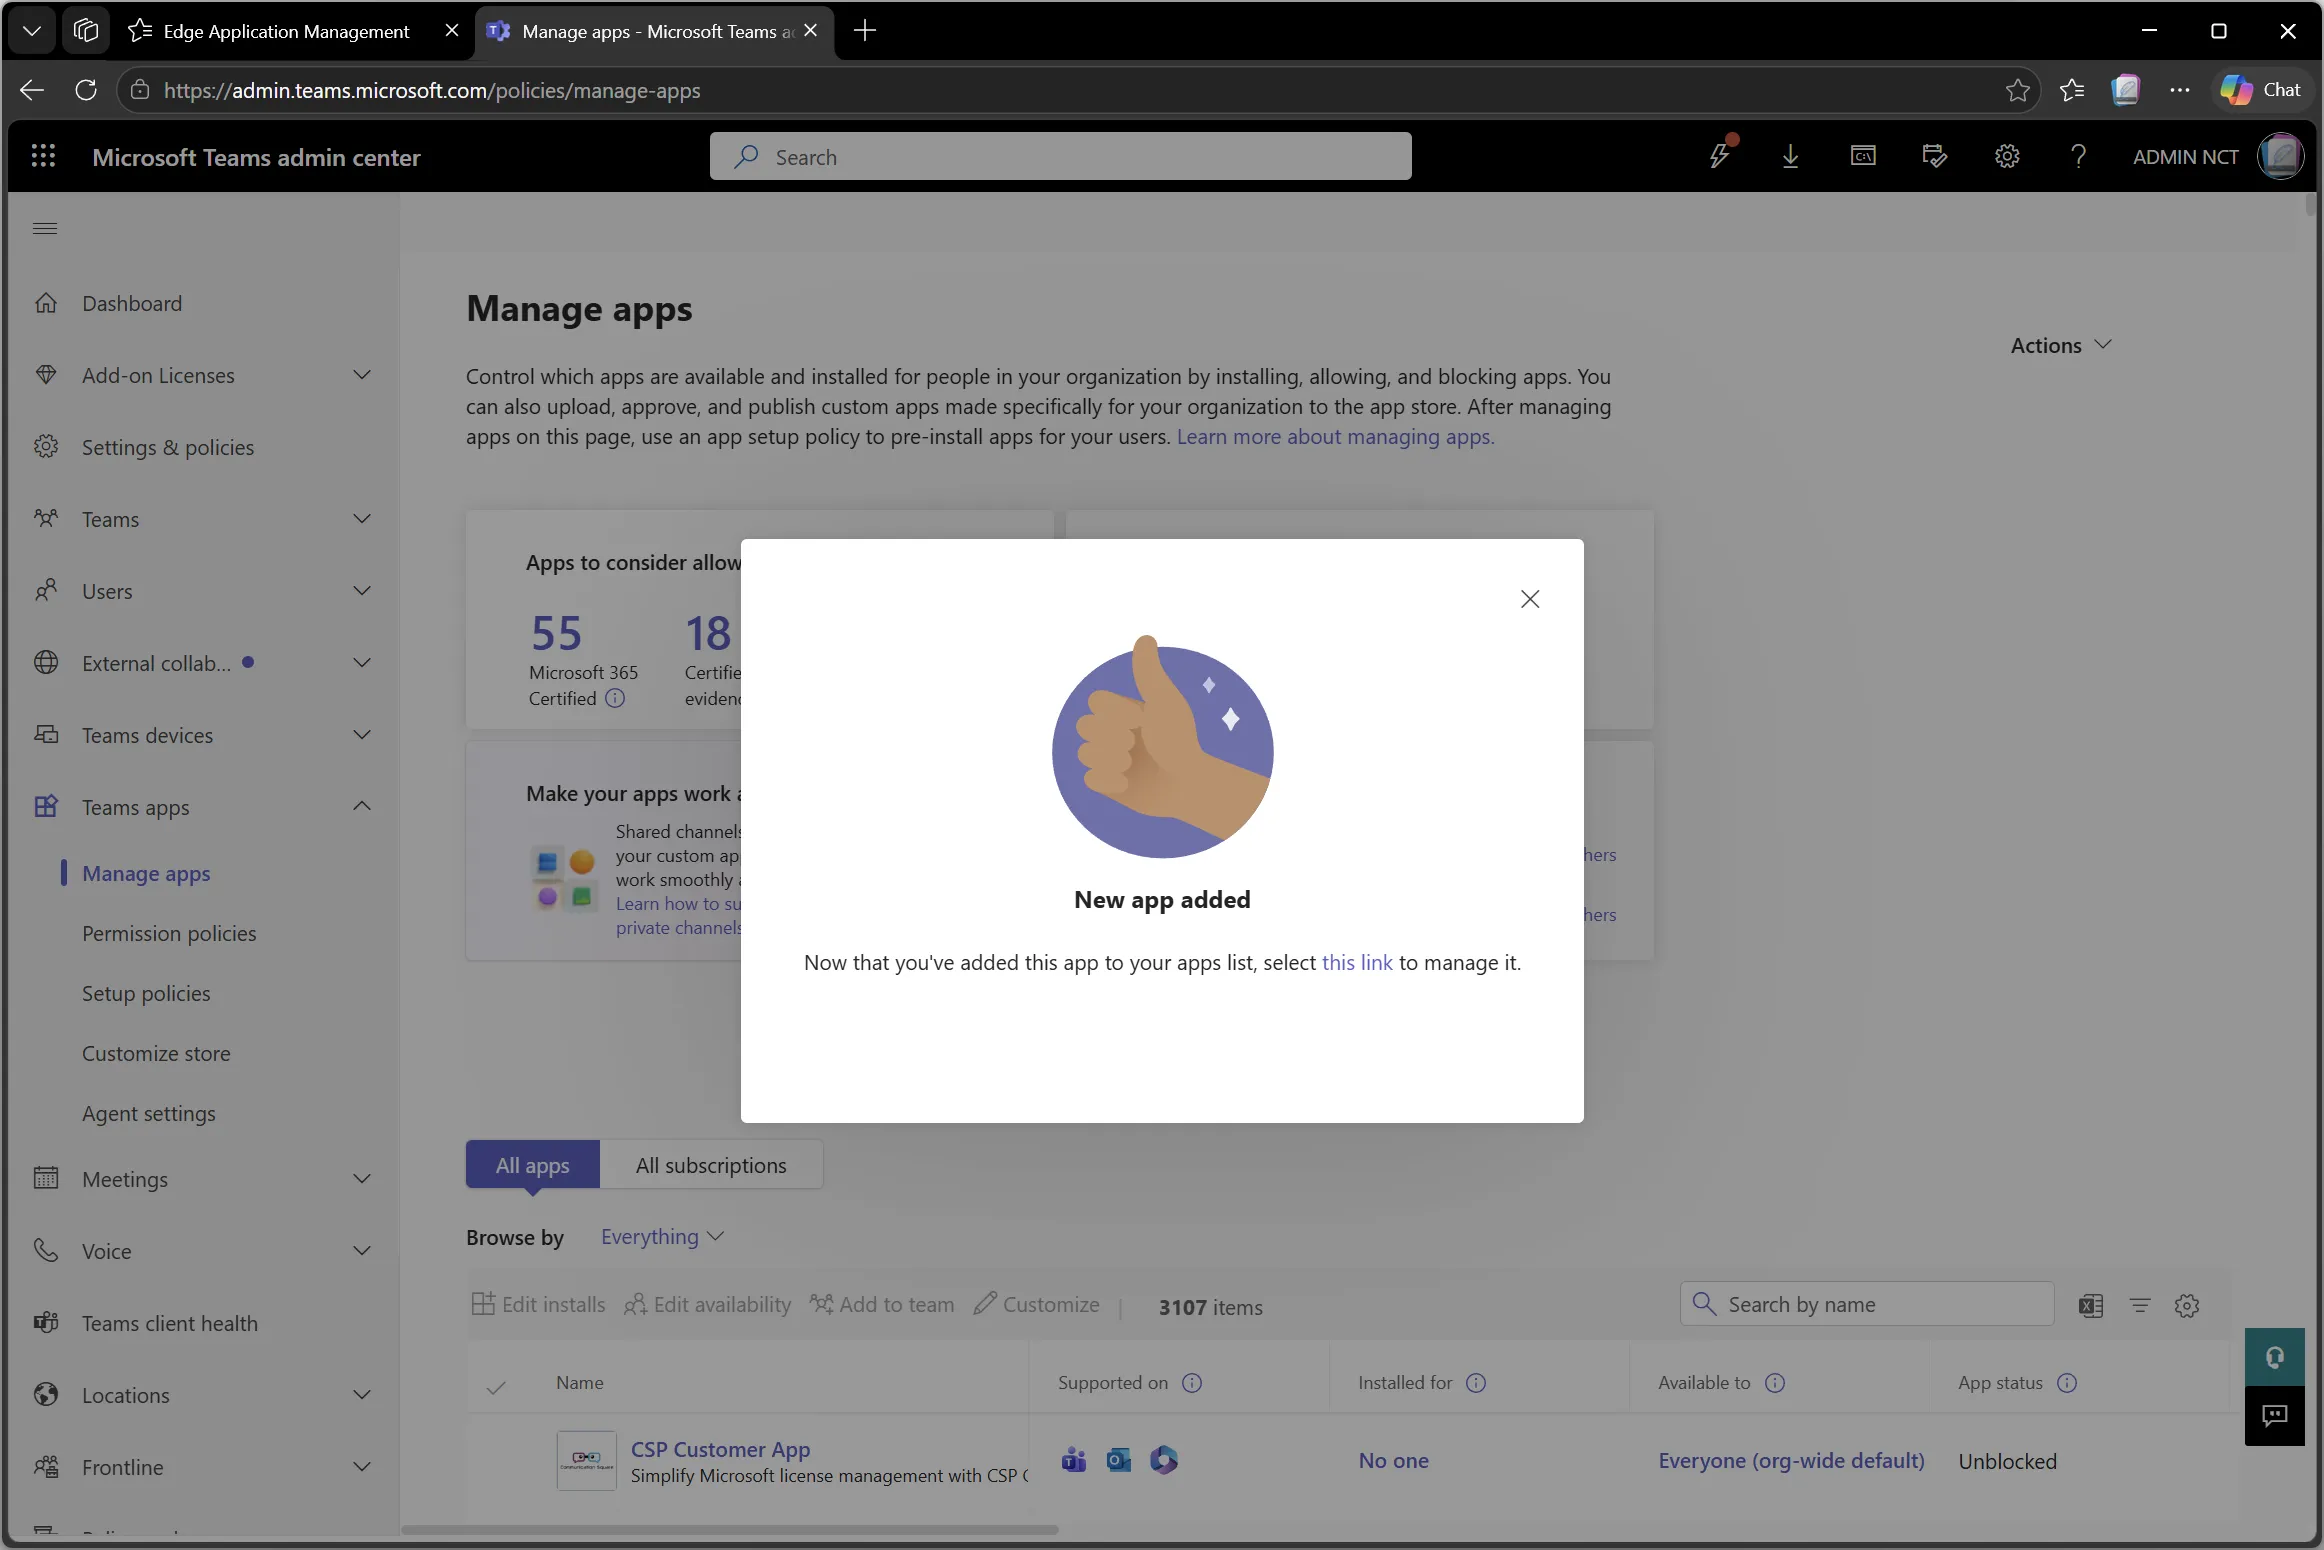
4. Open the Added App
After Teams admin center confirms that the new app was added, select this link in the dialog to manage Image Gallery.
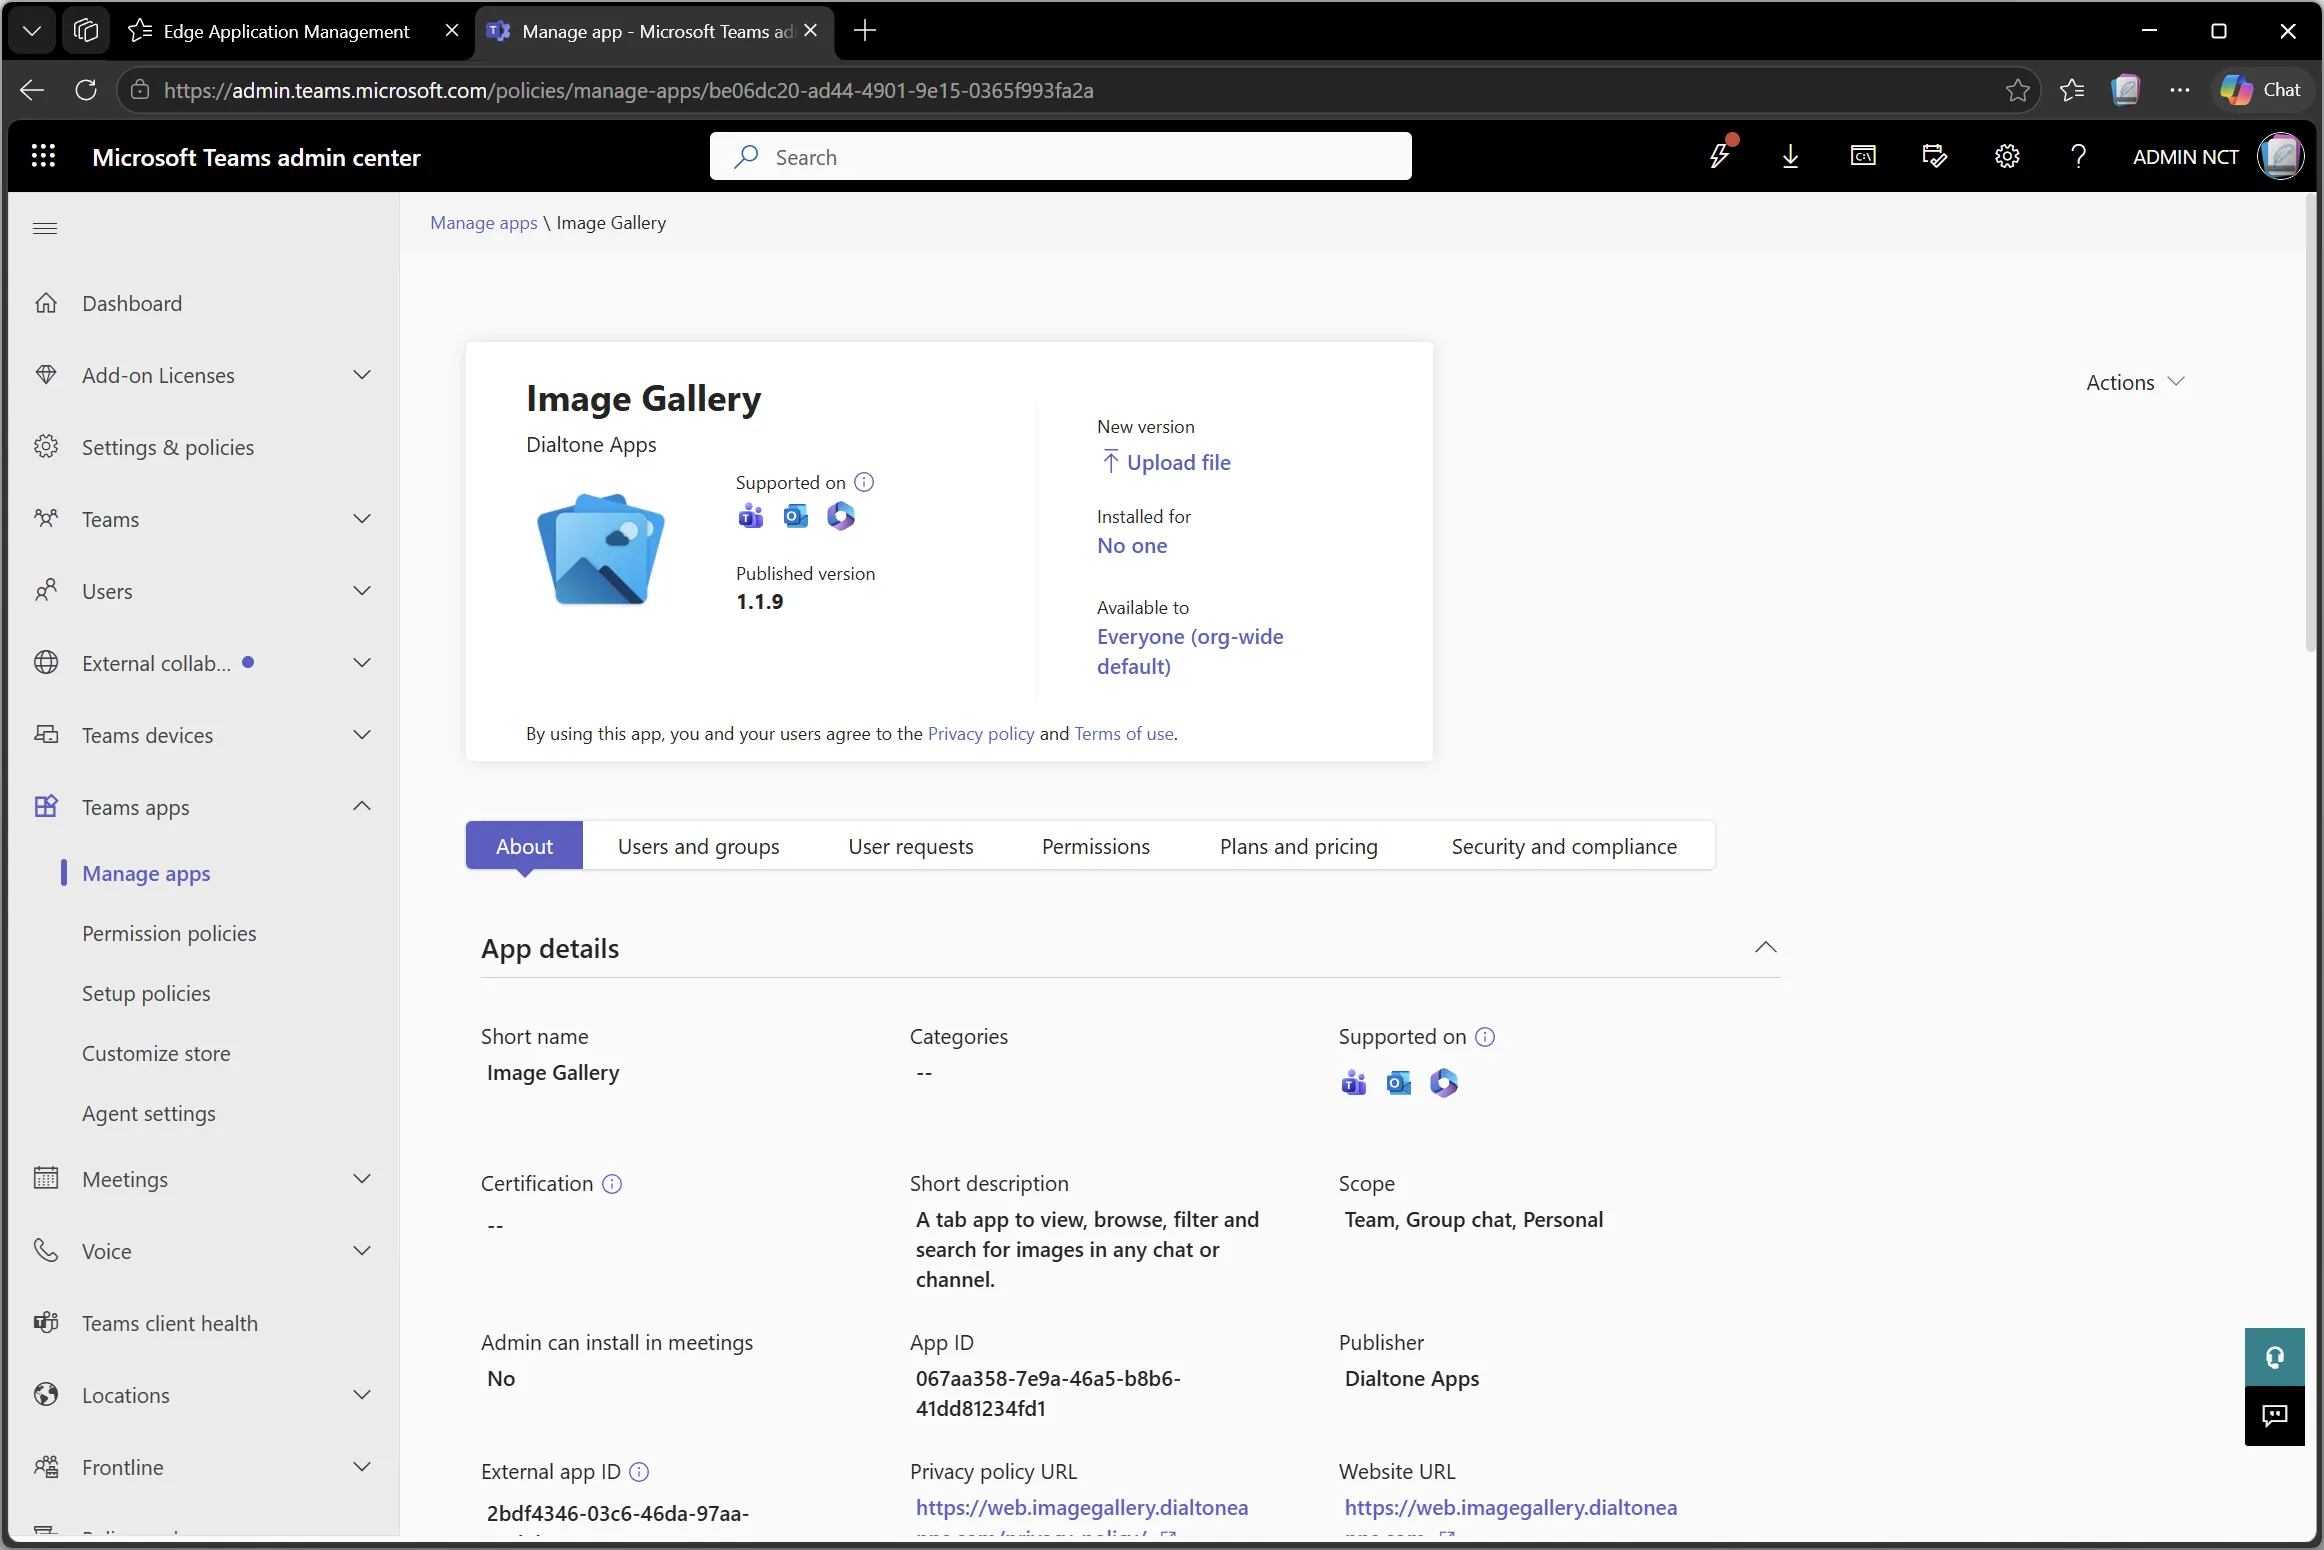
5. Review the App Page
Confirm that the app is Image Gallery by Dialtone Apps, then open the Permissions tab.
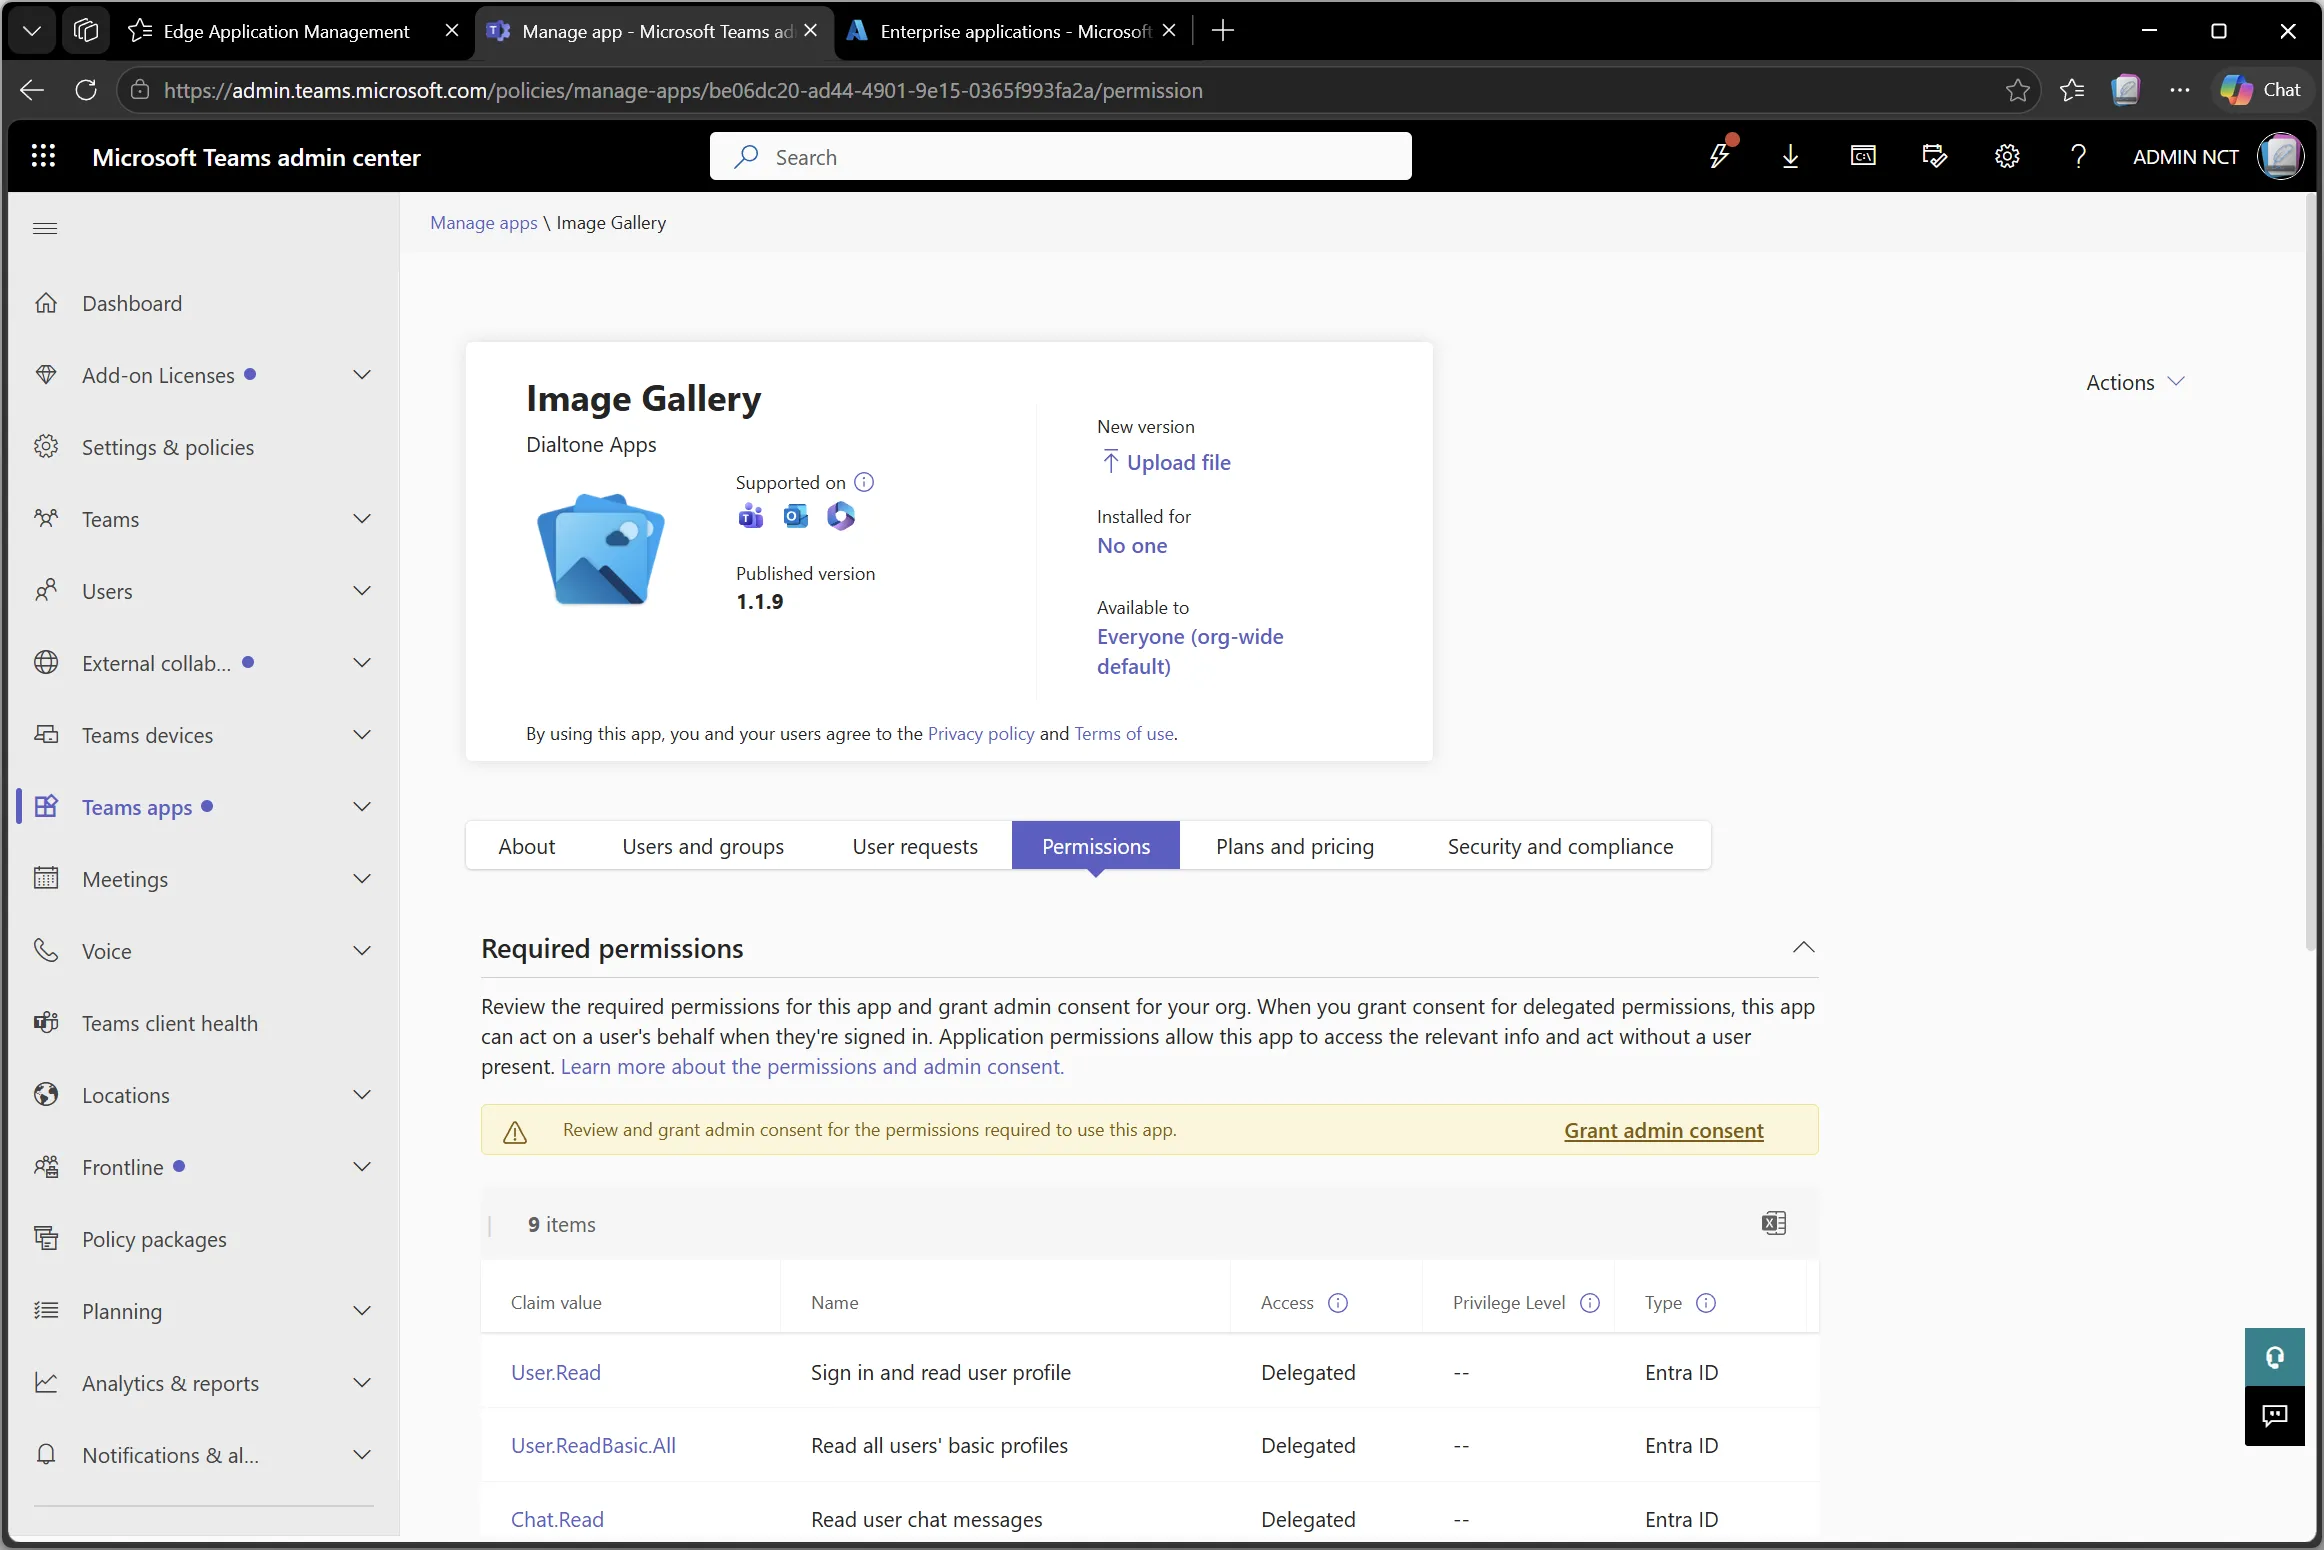
6. Review Permissions and Grant Admin Consent
On the Permissions tab, review the required delegated permissions and select Grant admin consent.
Verify before consent
Before granting consent, you may want to use the app identity verification details to verify the integrity of the consent link, the app (client) ID and the publisher tenant ID.
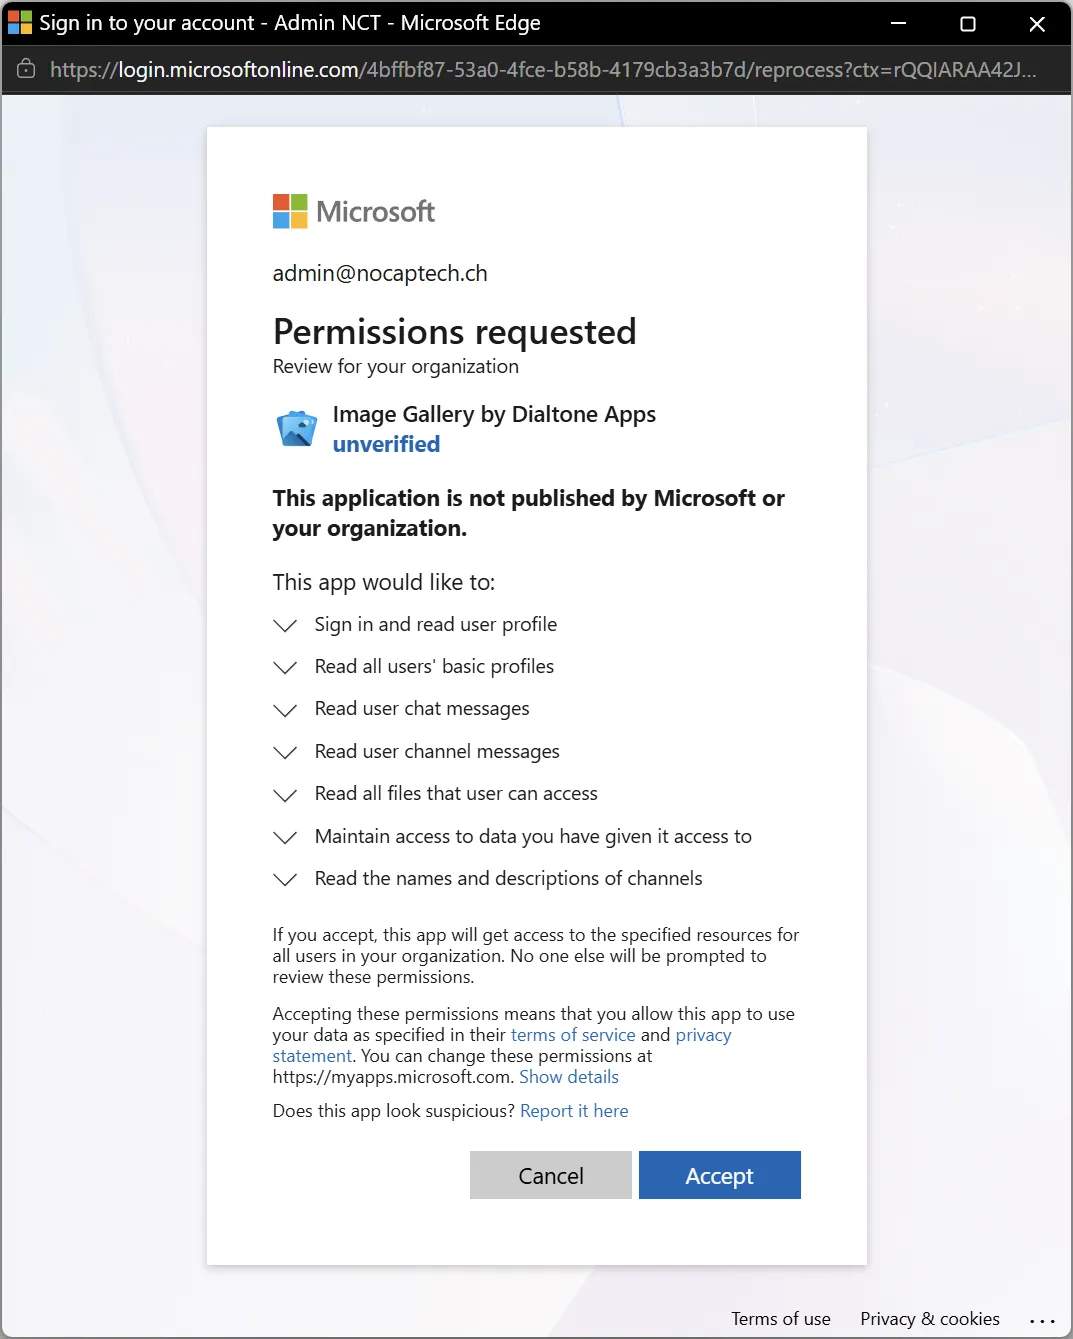
7. Choose an Admin Account
The consent window opens in a new tab. Choose the admin account you want to use for consent.

8. Accept the Requested Permissions
Review the permissions requested by Image Gallery. The consent dialog will show the publisher as unverified. That refers to the Microsoft publisher verification badge status, which Image Gallery currently doesn’t have. Use the proof of authenticity that the app identity verification details page provides to verify the app’s identity and then click Accept.
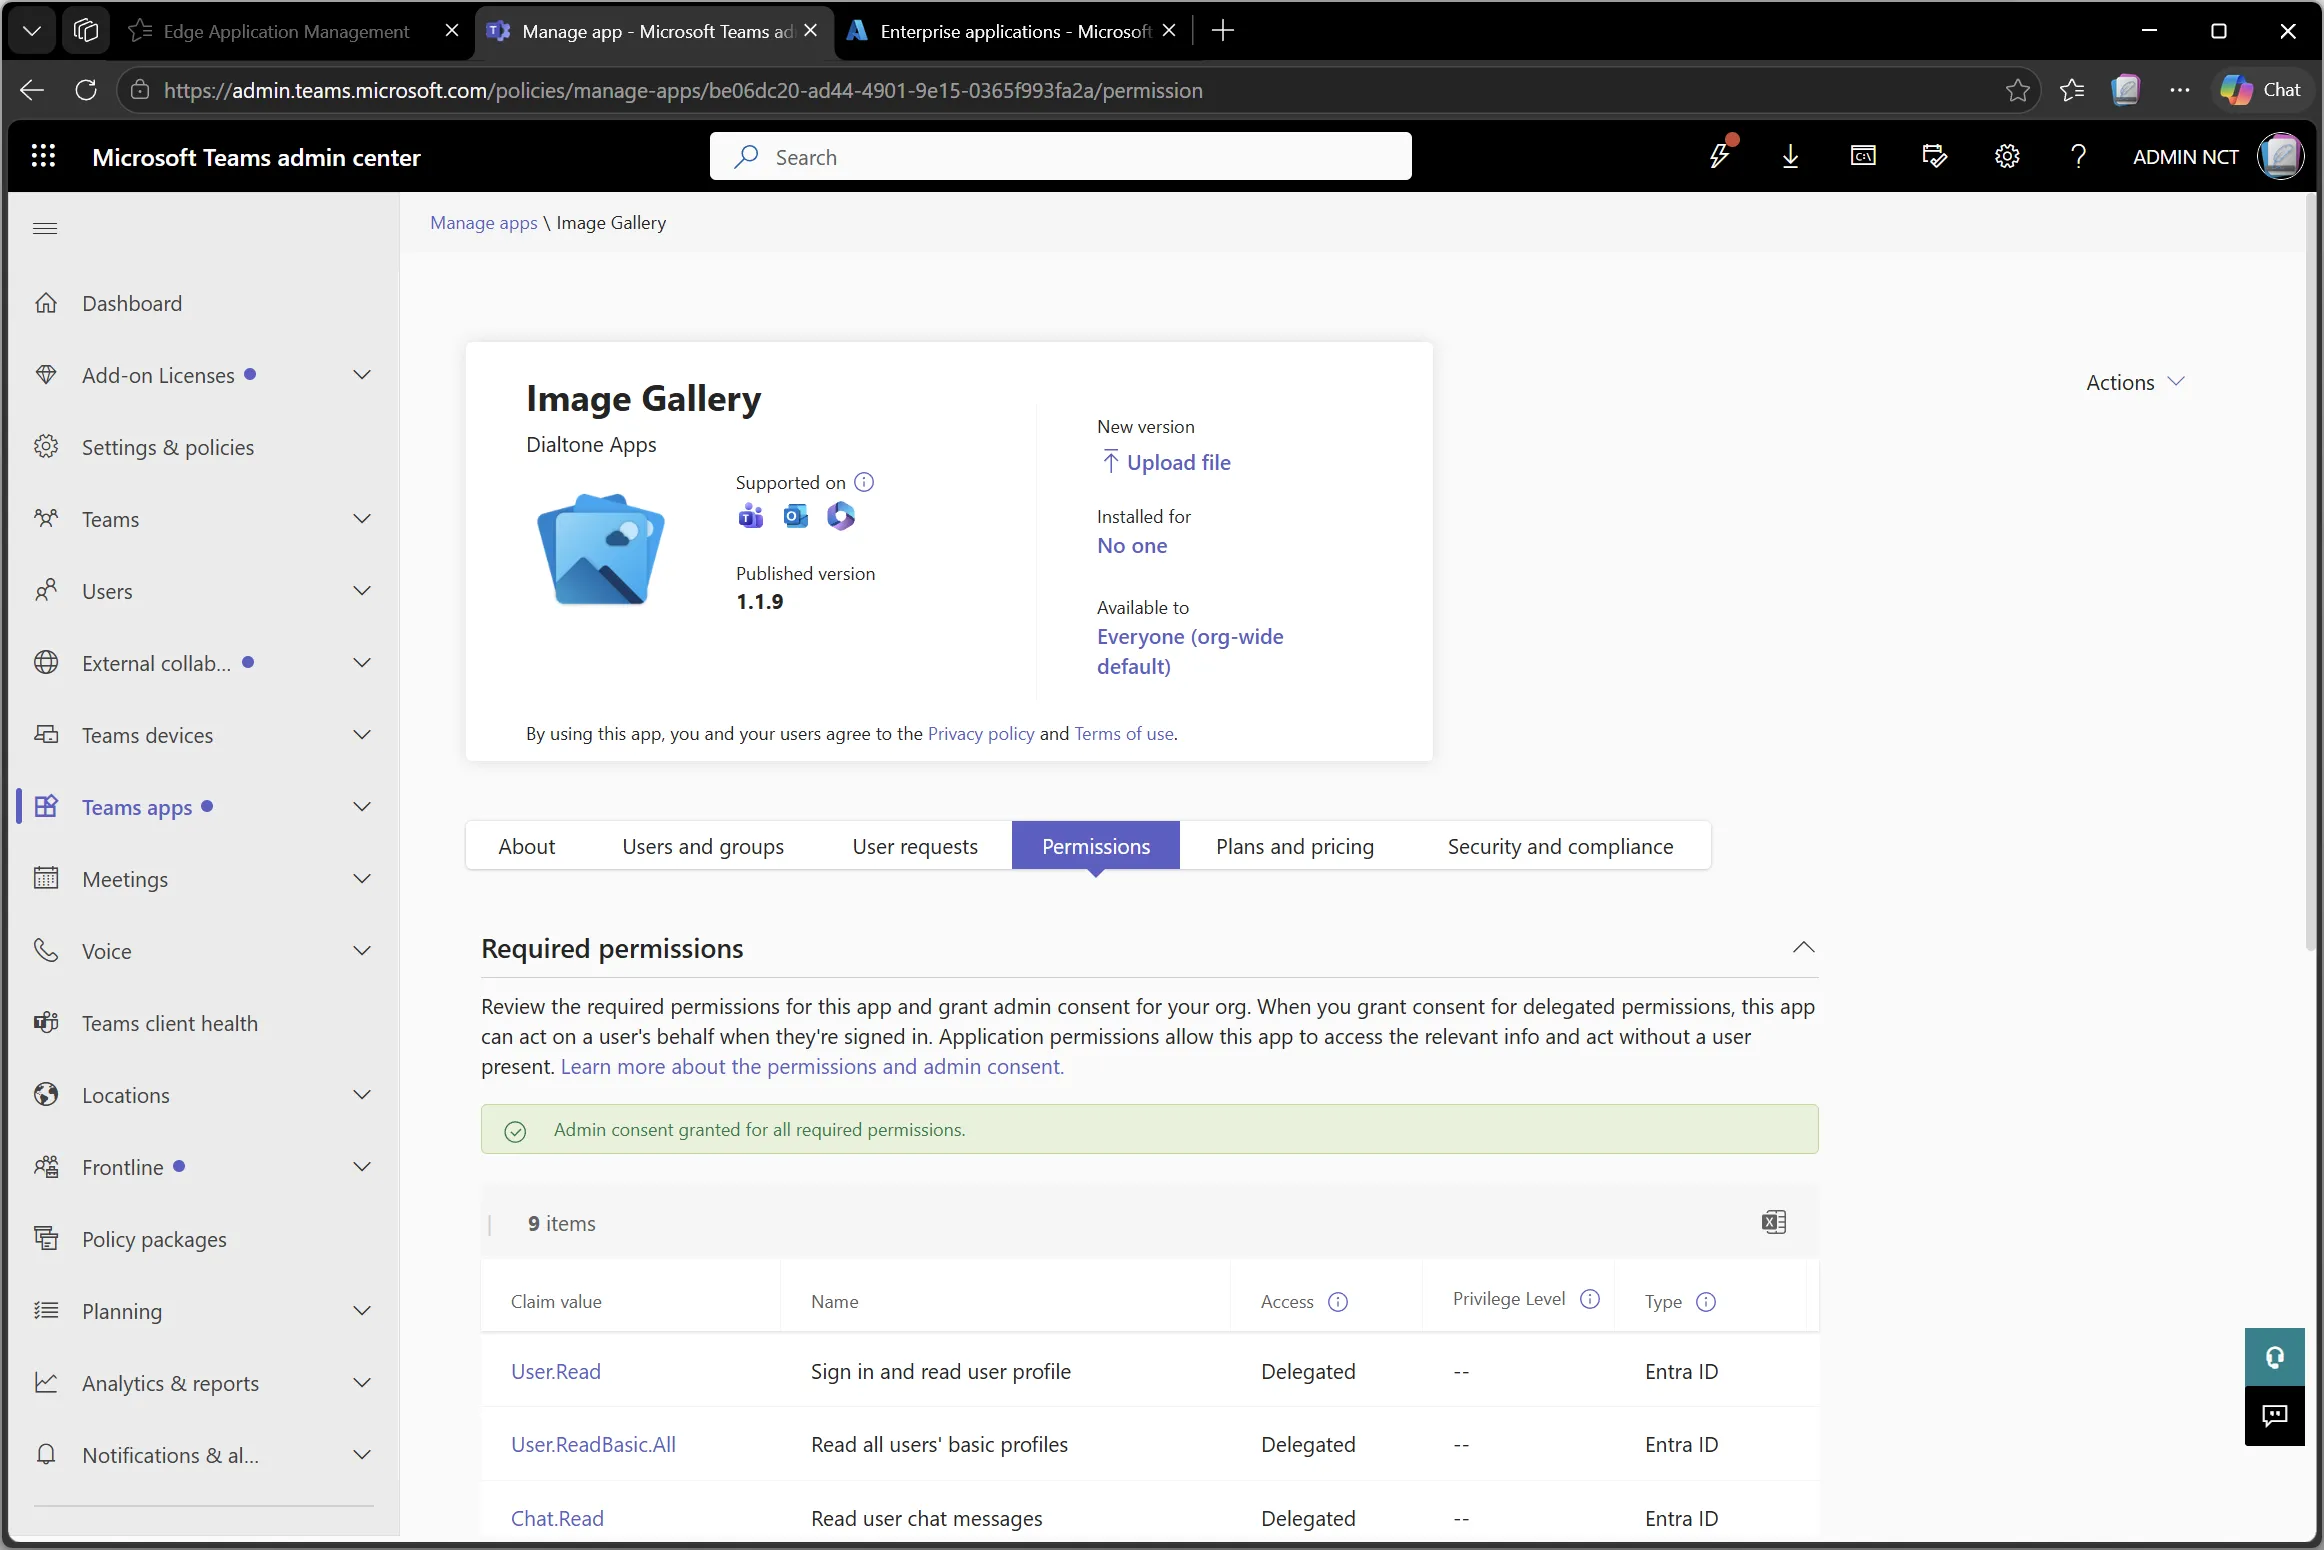
9. Confirm Consent Was Granted
Return to Teams admin center. The permissions tab should show that admin consent was granted for all required permissions.
After Setup
After upload and consent, confirm who should have access to Image Gallery in Teams. Teams administrators can manage app availability, app setup, and who can add or use the app through Teams admin center controls.
See the features page to explore and learn about what features Image Gallery has to offer.
Start Finding Images in Teams Faster Today.
Install Image Gallery and let up to 10 users try every feature free for 30 days. No payment or Stripe checkout is required to begin.